Tuesday, January 12, 2010

Miniature Dollhouse Cross Stitch Pillow "Christmas Poinsettia" Chart

You may have noticed that the above picture has the water mark Rosie-Cotton.blogspot.com
Its from one of three blogs I run. Just before Christmas I had planned on combining all three of my blogs due to health issues and lack of time. I did decide to keep this blog separate for my mini blogging and tutorials.I gal can change her mind cant she?
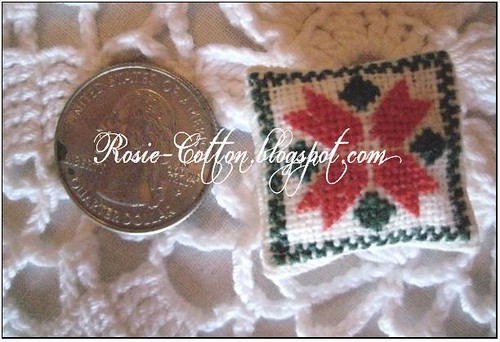
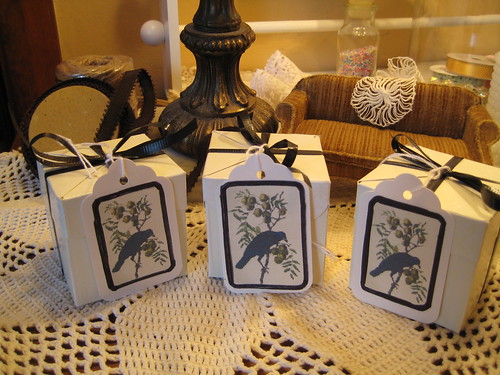
I made 15 of these little gems for a Christmas swap.


I stuffed them with cotton balls and used a polished cotton for the back of the pillow.

I also glued these together instead of sewing them together.

Tuesday, December 15, 2009

Bleaching and Dying Miniature Bottle Brush Trees Final Results


I have to say I am really pleased at the how these turned out. I put together this mini Easter Bunny vignette on top of one of my cake stands I made out of vintage glassware. The orange one is perfect! Reminds me of a carrot. The orange trees could be used for Halloween displays too!

The great gals over at a few of the mini forums I belong to made some wonderful suggestions as to how to dye these. Most who had tried this before recommended using the rite dye for permanent color. I didn't have any handy but I did have some cheapy Easter egg dye that we never used and it worked beautifully! I followed the package directions but used hot tap water. The directions didn't say either way on the water temp. I reheated the water in the microwave for a minute or two when it cooled.


First I practiced with the rusted tree just to see how it would turn out. I tried yellow first but it looked a bit too dark for me so I dunked it in the in the blue, that came out a pretty aqua color. Oh note on that, to get very light color trees, like the large light pink one, rinsed in cool tap water right away after dunking in the dye.

Make sure you start with dry trees before dipping into the dye. Just a quick dip into the dye is all it takes You can always dip them again if they are too light.

Ok this could work.

After dunking I dabbed them onto a paper towel, placed them back into their stands and left them to dry on the windowsill.

Yippee! That old vintage look I was going for!

Experimenting With Bleaching & Dying Miniature Trees Take One

It worked, it totally worked! I soaked the first batch in half bleach and half very hot tap water. The color came out almost immediately. I wanted these to be really white so I left them to soak over night. They rusted. So this afternoon I put three more in the same solution for 30 minutes and pushed them around with an old plastic utensil to help the color and snow dissolve off. Much better result. I rinsed in cool tap water really well. Shake off the excess water fluffed them. Now I am just waiting on them to dry before I play with Easter and cake dyes.


Monday, December 14, 2009

Dyeing Miniature Bottle Brush Christmas Trees Tutorial

Did you know you can dye those ugly miniature green bottle brush Christmas tress you get at the dollar store and turn them into something truly lovely? Sarah and Jack over at " Makin Projiks" shows you the tutorial , how to here . They dyed these really neato Halloween miniature trees to decorate their mantel. I have not tried this myself but I am sure you could dye them any color you wish. Different shades of green, pink, blue, or even vintage champagne, the creative possibilities are endless. I cant wait to play!

Thank you "Makin Projiks" for the tut and photo!

Thursday, March 19, 2009

Tutor / Medieval Swap Eye Candy

Opening day for the castle swap was very, very exciting. I am thrilled at the goodies I received. Take a look below at this miniature eye candy!


  • Mirror, mirror on the wall, whose the mini-est of them all . Kathy is! She made this 1:12 scale 3D mirror from scratch. I love it! Every castle has to have a ghost or two, and this one is just perfect for mine.


Bonnie created this pair of impressive miniature lovelies.

A niffty tiny cooking pot with wire handle and removable lid. I plan

on putting that lovely ornate mirror in Rosie's dollhouse when its completed.

Which will be very soon. Yeah right! I have read the instructions twice

and have a large table cleared in the back office, and that's about as

far as I have gotten. Someday (sigh) Anyway, enjoy!


Tutor / Medieval Dollhouse Minis

A yahoo group I am part of had this fabulous dollhouse tutor / medieval miniature swap. I decided to make a wooden jewel chest, its not really wooden per say its made of card stock, that's flat wood pulp, so yea, its a wooden chest. Ha Ha. The book cover is made with piece of card board cut to size and then shaped to fit over the book pages. Tissue paper, (my fancy way of saying TP) is then glued over the cover, let to dry and then painted. The pages are made from the end of an used legal pad, you know whats left over after you tare away all the paper, with a glued printie on top. Click here to go to the printables for I made for this.
Enjoy!
Tammy Renee
PS: Stay tuned for pics of some of what I received in this swap.


Dollhouse Printies - Miniature Old Medieval Books & Pages


Printable Miniature Medieval Jewel Chest


Click image to download. For personal use only.

Monday, February 9, 2009

Make A Miniature Beaded Fairy Tiara / Crown

Found this great video tutorial on making a miniature tiara at Garden Of Imagination . This looks to be in playscale. I am sure it could be easily made in smaller scales.

Enjoy!

Tammy Renee


Thursday, January 29, 2009

Dollhouse Scrap Pot Holder Tutorial (Real Life Scale)

How cute are these?! Nanette over at "Freda's Hive" shows you how to make these adorable dollhouse potholders. Wouldn't a quilt for a little girl be just lovely. With oodles of ribbon roses and lace curtains. Or how about using this pattern to decorate a dollhouse dustcover. You could just sew the cover and fusible web the houses onto it. What I like best of all is it uses up your leftover scraps. Thank you Nanette for sharing!!! Click here to go straight to the tutorial .
Enjoy!
Tammy Renee

Wednesday, January 28, 2009

Video How To: Make A Miniature Castle

Lizard Landscapes.com shows you how to make a castle for you very own real life dragon. OK, I know real life dragons don't exist but real mini ones do when its your pet lizard. Made out of very inexpensive, materials most Dollhouse hobbyist have around the house. The decorative sand he uses can be purchased at any dollar store. I recommend the liquid nails as an adhesive as well. I have used it to put together real life tombstones for my Halloween display. That was over 6 years ago and several hurricanes and they are still holding strong. Wouldn't it be neat to do one of these as sand castle covered in tiny shells and seaweed. I wonder how one would make mini seaweed? Oh and of course you would have to make a thrown for King Neptune. Or how about a place where pirates stash their loot. With oodles of treasure chests spilling over with mini pearls, gold, and jewels. Don't forget that lone ship wreck survivor, a skeleton holding a keg of rum. Comment with your ideas. I would love to hear them.

Enjoy!
Tammy Renee

Sunday, December 7, 2008

Tutorial: Vintage Dollhouse Witches Hat

A new member of one of my dollhouse miniature groups asked how I made this hat. Below is my reply. Feel free to post any questions in the comments section.

Belinda I have been planning on making a tutorial for this hat for a little while now. Here is a brief discription on how it's done. I took some scrap greeting card weigth card board and made a tall cone as a base to glue my fabric onto, which is a piece of vintage corduroy upholstery fabric glued on sideways.The salvage edge of the fabric was all fuzzy which I used as trim on the bottom. Test fit the fabric to see how you like it before you glue to the card board cone. You can trim later. Cover the cone in white tacky glue, enough to soak into the fabric and the card board. After the glue sets up for a few mins the glue softens the card board and you then mold, squish, crush your hat. Let dry. The feathers are small pieces of hand curled peacock feathers. The bow is an scrap of vintage green picot ribbon topped with an old tarnished jewlery finding.

Tuesday, September 30, 2008

My Miniture Fall Swap All Wrapped

My fall swap for my Miniature Castles group is all wrapped and ready to go! I hand made the tags using some vintage black bird on berries clip art. The sofa in the back I have recovered with some vintage upholstery material. I plan on making for it cushions soon.


Sunday, June 22, 2008

1:12 Miniature 4TH Of July Printies For Your Dollhouse

I made these printies a couple of years back for 4th of July stand.

I have a few firework tutorials in the works along with and will post them as soon as I am done with making a Halloween swap. I would love to hear comments and see pictures of any projects that my tuts and printies have helped create.

Friday, May 23, 2008

Dollhouse Basket Tutorial

Tips* This project can be very messy with all the glue. So to keep your hands very clean. (unless you want an old dirty looking basket) I use a couple of old wash cloths. One damp to clean the glue off my fingers and the other to dry.

Supplies and materials needed:
Quick Dry White Glue.
Close pins & Pencil
Piece Of Burlap- 7"x 3"
Scrap Cardboard
Condiment Cup (CC) The one I used in this project is a nugget sauce cup from a McFast food restaurant.

Trace the bottom of the CC on the scrap cardboard. The cut-out doesn't have to be perfect. The burlap will cover quite a few imperfections.

Next trim off the CC lip. I used a pair of sharp craft scissors. An Exacto knife will work too but be careful not to slip and cut down the side of the CC. Or worse yet your fingers. This is also the time to cut the CC shorter if you prefer shallow baskets.


Covering your basket
Cut burlap pieces. One 6.5" x 3" piece ( to cover basket ) and two pieces at least 1/4" bigger around then the cardboard bottoms.


Place a thin line of glue around the edges of all 3 pieces to keep from fraying while working. Let dry.

Next glue the two cardboard bottoms into the middle of matching burlap pieces. Set these aside to completely dry for later.

Match up the burlap along the inside bottom edge of CC. Leave about an 1/8" of starting end of burlap unglued so that the finished end of the fabric will match up correctly and the white side of the cup wont show.


Spread glue on one half of a short side and third of the way around to the next corner of the CC.

Do one corner and one side at a time. I like to make sure the pervious corner is almost dry if not all the way before going on to the next.


Continue gluing the side holding in place with close pins as you go.


As it dries go back and check glued burlap and press back into shape as needed. Basically you are molding the fabric over as it dry's.

When the 1st corner is almost dry, trim off all but a 1/4 inch of burlap. Do this in sections and add glue lines if fraying.


As you begin to work on the last corner flip the unglued burlap back.


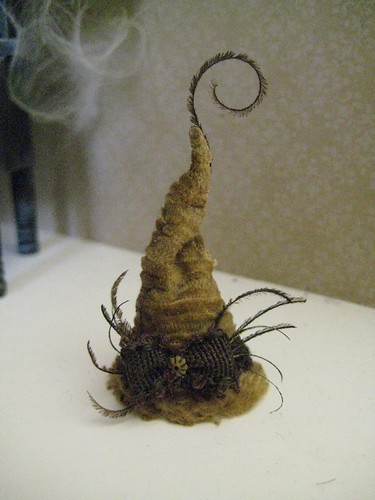
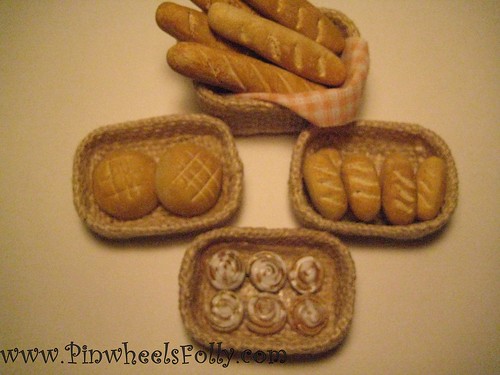
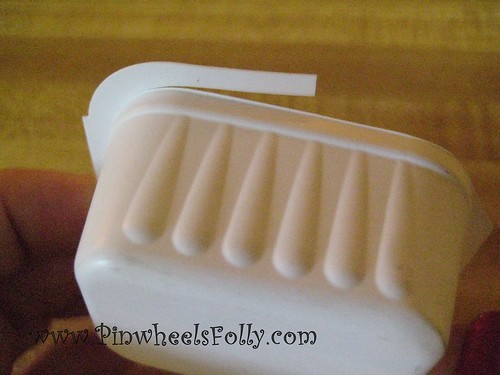
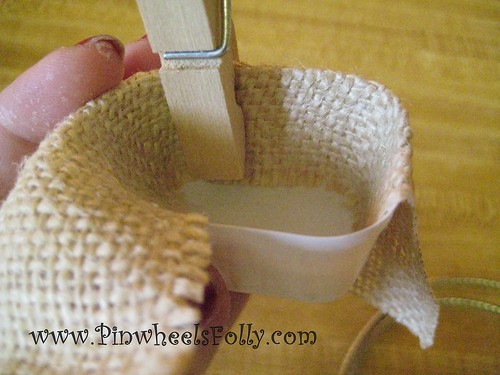
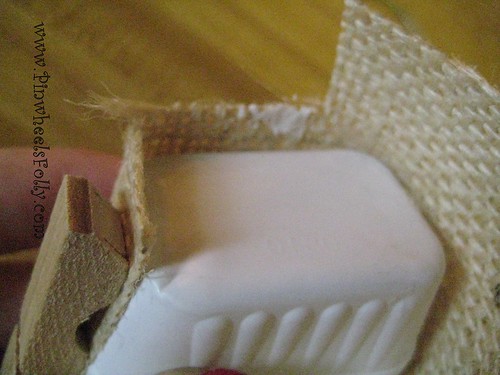
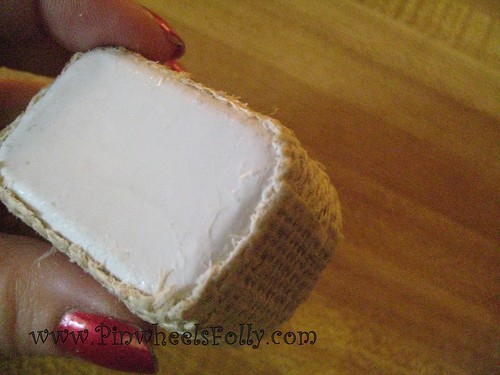
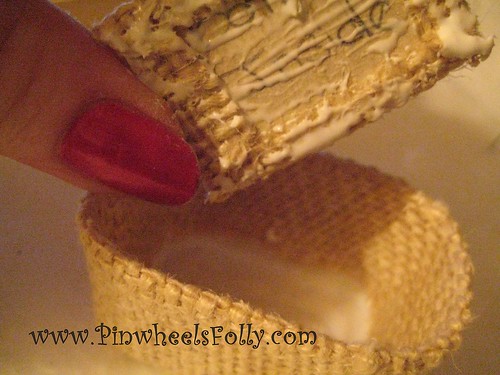
Glue ending burlap in place. Flip burlap back over and glue.


The inside should look something like this now.


Trim off a little under an 1/8" from the bottom edge. Glue and mold to the sides.

Finishing Basket Bottoms
Now begin gluing the two bottom pieces you had set aside earlier to dry. Fold over all four pieces of burlap and glue. Trim off corners when dry.


Glue the bottom inside piece first into the CC


As the glue soaks into cardboard it will be more ply able and easier to mold to the curved bottom for a nice fit

Use a generous amount of glue on the burlap covered cardboard bottom piece


Push until you see some glue. Spread excess glue with a pin along the edge and start molding again. Make sure your hands are clean. Add more glue to make ply-able as need to mold.

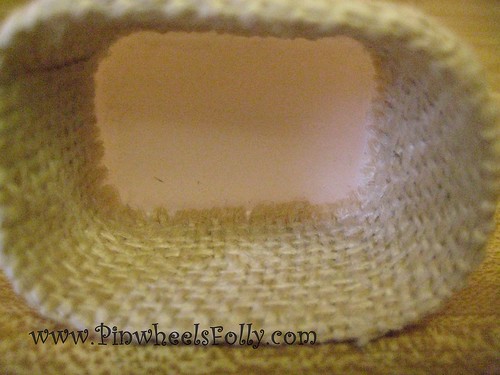
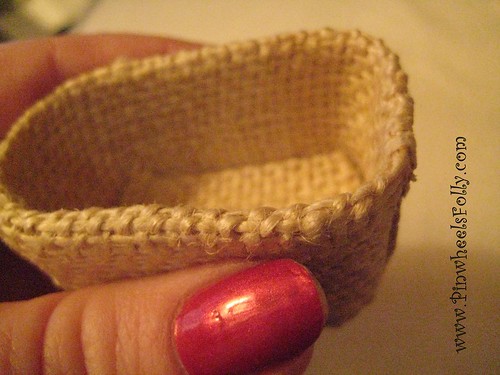
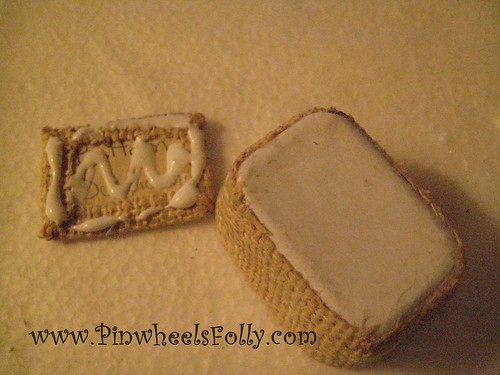
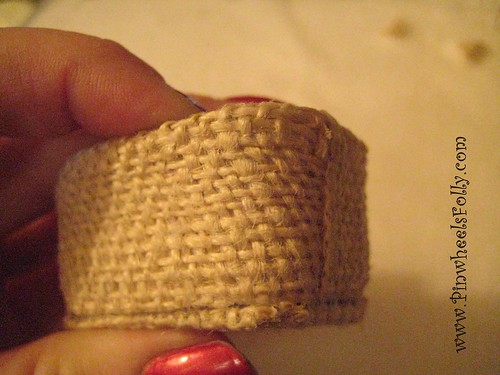
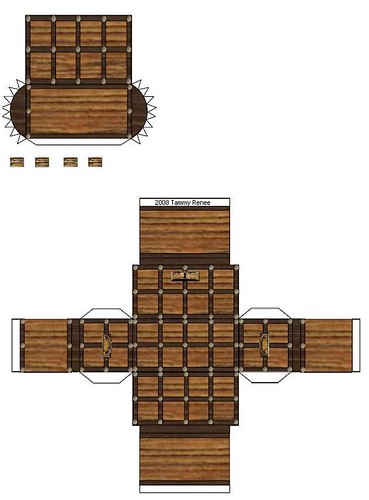
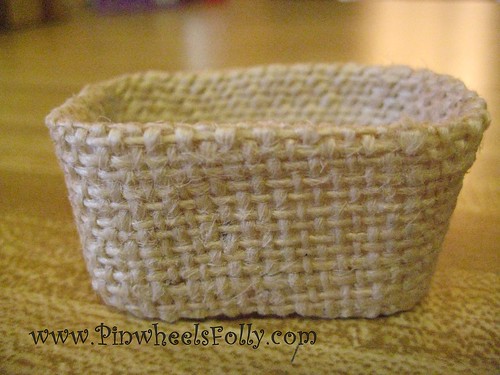
Enjoy your new basket!
Permission is explicitly denied for any republication of text or photographs in this article without the prior express written consent of the author.

metatag